How to Make More Currency with Endgame Atlas Tips in PoE2
Background
This Runes of Aldur route is a checklist of short Atlas opportunities, not one farm that must be run from start to finish. Use the tip that matches the content currently visible on your Atlas.
The value comes from lowering entry costs, scaling a specific reward, or converting an otherwise ordinary map into a saleable item. Most of the quoted prices are volatile. Test one cycle, record what actually sells, and only then buy a larger batch.
Required Setup
| Opportunity | Required Setup | Exact Target | Main Check |
|---|---|---|---|
| Crux of Nothingness | An Audience with the King and a boss-capable build | Head of the King, Omens, Ingenuity, and From Nothing Diamond | Spawn beside a completed map when possible |
| Currency Womb | Lavish Wombgift, Hiveblood, and the relevant Genesis Tree allocation | Catalyst and currency outcomes | Prefer lower item level when the output odds are unchanged |
| Breachstone Womb | 300 Breach Splinters, Currency Exchange access, and Hiveblood | A low-level Revelatory Wombgift | Test one exchange cancellation before converting a batch |
| Azmerian Ranges | Berek's Grip, Berek's Pass, and Berek's Respite | The Taming | The exchange can be used once per Azmerian Ranges map |
| Copper Citadel | Doryani's Science, Evolutionary Pressure, and Improved Calibration | Faded Crisis Fragment | Aim for about 130% Waystone Drop Chance on the Waystone |
| Grand Expedition | Expedition coverage and a Tablet with (30–40)% increased Quantity of Waystones found in Map | More Runes from Remnants | Experimental; verify with your own sample |
| Grand Mirror setup | Delirium Tablet with of Shattering: Delirium Fog in Map spawns (12–26)% increased Mirror Shards | Capricious Shards and a nearby Grand Mirror | Break every lit Shard, then kill the Map Boss in fog |
Farming Loop
Step 1: Clear Stored Crux of Nothingness Spawns
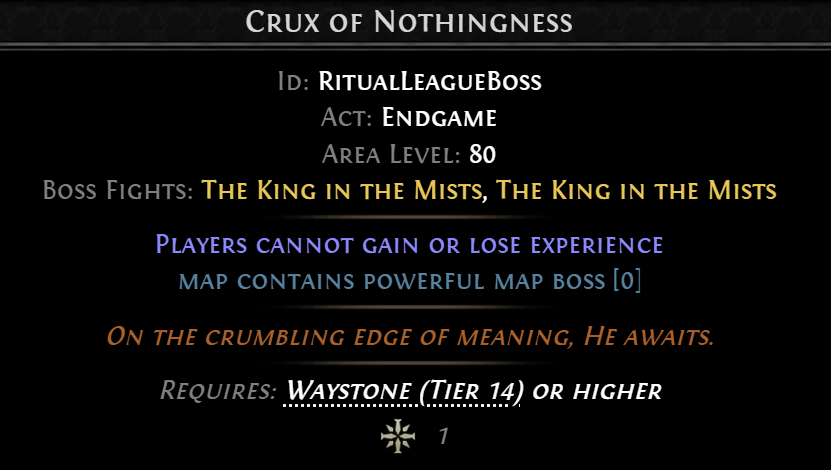
Carry An Audience with the King while inspecting the Atlas. Eligible positions can create a Crux of Nothingness. Place it beside a map you have already completed so you can enter without clearing another route map first.
Step 2: Use Low-Level Lavish Wombgifts
Do not pay extra for a high item-level Lavish Wombgift when your goal is Catalyst or currency output. A comparison of more than 100 item-level 82 gifts against the same number around item level 65 found no improvement in Catalyst results. The higher-level gifts consumed more Hiveblood.
This shortcut applies only to Lavish Wombgift. Item level still matters for Wombgifts that create rings, amulets, or belts. Keep those jewellery inputs separate when buying and sorting.
Step 3: Reduce the Hiveblood Cost of Breachstones
Build a full stack of 300 Breach Splinters. List the stack on the Currency Exchange at a price that is not expected to fill, then cancel the listing immediately. In the captured setup, the returned stack became an item-level 65 Revelatory Wombgift.
Grow that gift in the Breachstone Womb. The level 65 version cost about 400 Hiveblood, compared with more than 3,000 for the level 80 version created through ordinary inventory restacking. This behavior may be patched. Test one stack first, and never risk a listing price that another player might accept.
Step 4: Convert the Three Berek Rings
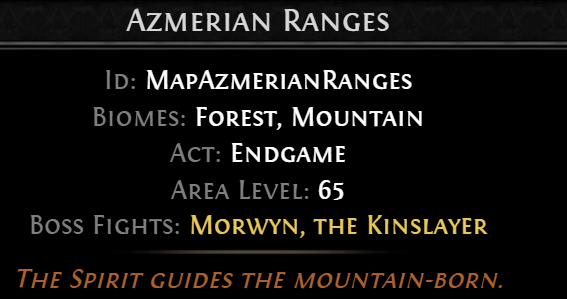
When you find an Azmerian Ranges map, bring Berek's Grip, Berek's Pass, and Berek's Respite. Enter the small side nook near the start and use its exchange device to combine the three rings into The Taming.
The exchange works once per Azmerian Ranges map. On 2026-07-31, the three inputs were reported near 50–60 Exalted Orbs each while The Taming sold for about five Divine Orbs. Check all four prices before entering; the conversion is only useful when the spread survives trading costs and sale time.
Step 5: Scale Copper Citadel Fragments
Select Doryani's Science with Evolutionary Pressure and Improved Calibration. Use a Waystone that reaches about 130% Waystone Drop Chance after Doryani's modifier effect. Copper Citadels do not accept Tablet coverage, so the Waystone and Atlas Master carry the setup.
The source observed that this breakpoint produced two Faded Crisis Fragments very consistently, but it is not an official guarantee. The dated market valued Faded fragments near nine Divines while Ancient and Weathered fragments were near one. Run a small sample before paying heavily for 130% Waystones. The same Waystone Drop Chance principle can also help Irradiated Tablet drops and other fragment content, without requiring the 130% breakpoint.
Evolutionary Pressure also gives monsters 2% increased Effectiveness per explicit Waystone modifier. Do not use the highest-modifier stone if its combat rolls make the Citadel unsafe.
Step 6: Test Waystone Quantity in Grand Expedition
For Grand Expedition, prioritize (30–40)% increased Quantity of Waystones found in Map on the Tablet. The reported test suggested this modifier increased the average number of Runes from Remnants, while other common map modifiers did not meaningfully scale those rewards.
This claim was not personally verified in the source. Treat it as an experiment. Compare equal batches with and without Waystone Quantity, count Runes per Remnant, and avoid expensive Tablet purchases until your results support the setup.
Step 7: Force More Grand Mirror Attempts
Use a Delirium Tablet with the of Shattering suffix: Delirium Fog in Map spawns (12–26)% increased Mirror Shards. Run travel maps around the city biome you want to raise toward 200% Deliriousness.
Watch the Delirium bar and break every Shard as soon as it lights up, including Shards that appear slightly off-screen. Capricious Shards can cause a Map Boss slain in fog to manifest a Grand Mirror on a nearby map. Skipping a Shard can disrupt later Delirium rewards and may reduce Grand Mirror attempts. Keep moving, reach the boss inside the fog, kill it, then inspect adjacent maps.
What to Skip
- Skip a Crux run when the key costs more than the conservative value of one Head.
- Skip high-level Lavish Wombgifts sold at a premium solely for Catalyst output.
- Skip the Breachstone Exchange trick if one test does not return a level 65 gift.
- Skip the Berek conversion when The Taming cannot sell above the three-ring cost.
- Skip a 130% Copper Citadel Waystone when its combat modifiers can kill your build.
- Skip expensive Grand Expedition Tablets until your own Rune sample confirms the interaction.
- Never skip a lit Delirium Shard during a Grand Mirror setup map.
Profit And Risk
These tips trade consistency for timing. The Berek conversion and low-level Wombgift method have clear input costs, but the boss, fragment, Expedition, and Grand Mirror routes still depend on drops or map generation.
The largest risk is stale pricing. Recheck An Audience with the King, Head of the King, all three Berek rings, The Taming, and Crisis Fragments before committing currency. The second risk is patch sensitivity. The level 65 Revelatory Wombgift conversion looks like an implementation quirk and may disappear without notice.
Build strength matters at the Crux, Copper Citadel, and inside Delirium Fog. A profitable setup on paper is a loss if the character cannot finish the boss, loses the fog, or bricks an expensive Waystone.
Summary
Scan the Atlas before buying a fixed farm in bulk. Convert Azmerian Ranges and low-level Wombgift opportunities immediately, reserve Doryani and high Waystone Drop Chance for Copper Citadels, and test the cheaper Revelatory Wombgift conversion one stack at a time.
For Delirium, stack the exact increased Mirror Shards modifier, break every lit Shard, and kill the Map Boss inside fog. Track real sales and Rune counts so dated prices and experimental interactions never become assumptions.